Wednesday, May 14, 2014

CUTE SCRAPBOOK LAYOUT

Hi all, today am posting a layout created based on the sketch given  by  beyond grey challenges. I chose the title of my layout as " cute". Here are some pics. 


Here is the sketch given:


I started off by colouring the canvas sheet using distress ink. Then used  pieces of pattern paper to create layers. The image is printed from net. The title is handcut from black cardboard sheet.The flowers are handmade and the bottle caps are used for stamping. 


Happy Crafting!!

Beyond grey challenge - Sketch challenge

Saturday, May 10, 2014

HANDBAG GREETING CARD

Hello Friends, Hope you all are doing good!! Today am posting a card made for a special person - my mom. Yes its a mother's day card.  The Current theme of lulupu challenge is to make feminine cards. And since its eve of mother's day I wanted to make a different yet cute card carrying the theme of both. My mom loves different handbags so I thought why not make a handbag card for her.  I googled upon and found a simpler version of making handbag card and here are some pics.


I decided to stick with the monochromatic colour scheme for this card ( only white and violet). So used differen shades purple and violet for background and embellishments. 


Inside the card I wrote the quote using black marker and pasted a handmade daisy.


I decorated the card using border punches , flowers , butterflies and pearls. 


THE MAKING PICS:


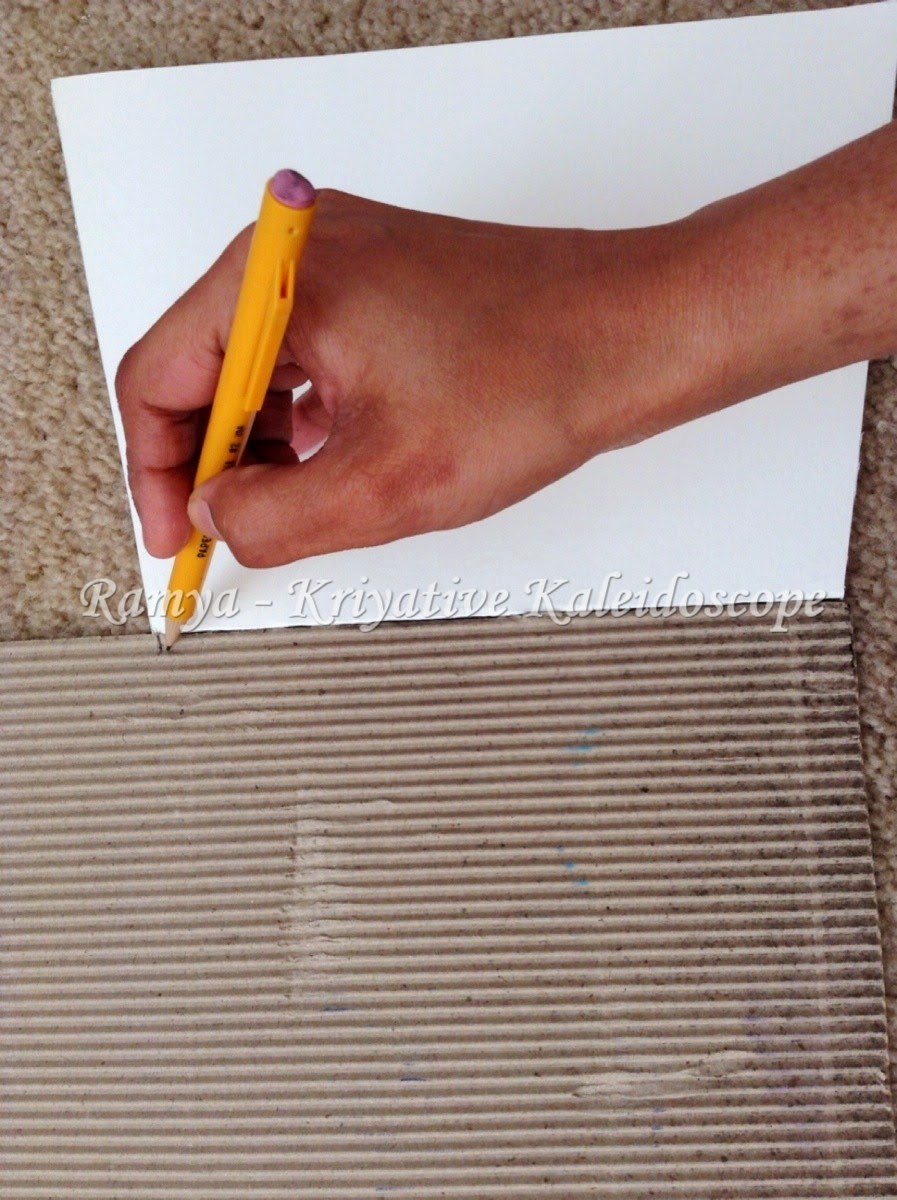
Take a canvas paper or chart paper of required size of your bag. Fold it into half. Cut it into a shape of the handbag. Here I cut it into a trapezoidal shape. 


For making the flap of the bag it is better to use corrugated sheet. Since I din't have proper paints for covering the corrugated sheet I used a white sheet for the flap. Draw designs on the corrugated sheet and cut them. Cut the handle from a piece of cardboard and paste it at the back. 


Initially cut all the pieces, cover them with pattern paper and then glue everything together. 


Dedicating this card to my mother and mother- in - law. 

Happy mother's day to all the mothers!!

Submitting to

Itsy- Bitsy Challenge - " Monochromatic challenge" - I have used violet with white colour throughout the card.

Lulupu challenge - " Feminine cards"


Wednesday, April 30, 2014

DIY TERRACOTA JEWELLERY - NECKLACE AND EARRING

Hello friends, Welcome back!! Today am going to share with you all the tutorial of making terracota necklace and earring. I wanted to do this terracota jewellery for a long time but din't find the clear procedure for baking the clay. Last week when I had been to Michaels I spotted on this air - dry terracota clay. So here is my first attempt in making a terracota jewellery.  ( picture heavy post)


Terracota jewellery making is same as any other clay jewellery making. For this project I have used polyfrom model air clay - terracota. 


MATERIALS NEEDED:
  1. Terracota clay
  2. Talcum powder for kneading the clay
  3. Circular base like plastic bottle cap
  4. Knife
  5. Carving tools ( I used old refill , toothpick and floral wire)
  6. Floral wire
  7. jewellery making rope
  8. eye pins and fish hooks 
  9. Pearl paints or metallic acrylic paints
  10. Plier and cutter
PROCEDURE:
TO MAKE THE BEADS

Knead the clay and make identical balls. Allow it to dry for 5 min and make a hole by inserting the ball into a toothpick. Make as many beads as needed for making necklace. I made 30 beads. 

TO MAKE JHUMKAS:


Make 2 medium sized balls out of clay. Using a knife cut little away from centre to get one portion bigger than the other. Take the bigger portion of the two and smoothen its edges to get the shape of a jhumka. 


TO MAKE THE PENDANT:

 
Flatten the clay by rolling it with a rolling pin ( I used ball point pen for rolling). Take the lid or cap of some bottle that has a circular base ( I used the milk tin cap) and press it on the clay. You will get a rounded shape. 
Now use the same circular base and press once again to get the half moon shape and a tear drop shape.Carve designs on the pendant using carving tools . Here I have carved a simple design using a floral wire.
                              
Make small beads out of clay. Cut floral wire into small pieces. Insert the piece of floral wire onto the beads and attach them to the side of the pendant. Attach eye pins. 

 Terracota clay takes maximum 24 hours to get dried fully and become hard. Once it is completely dried there will be no moisture and the colour will become slightly pale ( see pic above for dried beads).

Colour the beads , pendants and jhumkas using pearl acrylic paints of your choice. Since I did'nt have pearl colours I have used acrylics and applied a coat of gloss varnish. I use this arrangement for colouring the beads. Tape two floral wires on top of a box and slide the beads through the wire and colour them. 

Use liner brush for making fine details in the pendant. I chose black and golden colour as it goes well with all colours of dress. 

I have added small beads to the jhumkas also. 

Take a jewellery rope and insert the pendant at the centre of the rope. On both sides of the pendant add the beads. 

Do try it out. Your feedback and suggestions are welcome. Happy crafting!!!

Submitting to
Colour conceptions challenge - " Anything but cards"
Itsy - Bitsy challenge - " monochromatic challenge" - Use any one colour other than black or white - I have used golden with black and created a jewellery set. 
Challenges 4 everybody  - " Anything goes"


Sunday, April 27, 2014

BLACK AND GOLD CAS CARD

Hello friends, Today am sharing with you a black and gold cas card made for beyond grey challenge.


The feathers are cut from a white cardstock and painted using gold metallic colour.


Submitting to

Beyond grey challenges

Thursday, April 24, 2014

RECYCLED BOTTLE CAP EARRINGS

Hello Friends , Today am posting an earring made by recycling plastic bottle caps. The colours are inspired from everyday earrings april reveal picture.


Take two identical bottle caps and make hole at the top using needle ( or safety pin). Insert an eye pin through the hole. 


Then colour the bottle caps using acrylics. The fine designs are made using liner brush. 


Earrings everyday april inspiration picture:


I have used the colours brown , lemon yellow , green and white from the picture.

Hope you all like my creation!! Happy Crafting!!

Submitting to
Everyday Earrings


Wednesday, April 23, 2014

LATTICE WINDOW CARD

Hello Friends, Today am posting the tutorial of making a lattice window card. This tutorial and design was inspired by Valita's fresh folds blog . Click her blog to see lots of video tutorials. 


SOME PICS OF MAKING THE CARD:


Initially take a cardstock ( of any size and colour) and fold it into half. Draw a rectangular design on one side of the folded card and cut it out using a craft knife. 


Take a long strip of cardstock and roll it into a cylindrical shape.  Open the card and paste this folded strip to the innerside of the card. 


Measure the length from the cylindrical strip to the bottom of the card and Cut small strips of cardstock.  Paste it vertically as shown in the above picture. 


Similarly measure the horizontal length and cut strips from cardstock. Now weave the horizontal strips over and under the vertical strips.


This is how the inner side of the card looks.


At the outer side we have the look of a window.


I decorated this card using simple quilled flowers and added a sentiment to it. I wanted the lattice window to be seen clearly so did'nt embellish much and kept it simple.