Thursday, November 3, 2016

PORTRAIT SKETCH

Hello everyone , Welcome back to my blog!! Today am sharing with you all my first attempt in doing a portrait sketch .I always wanted to but was afraid of drawing portrait. My wish came true after I followed the tutorial by  Like sketch.com  and learnt the basics of facial proportions and shading.


Do leave your comments and suggestions. See you soon with another interesting post. Have a nice week.


Friday, October 21, 2016

10 UNIQUE DIWALI CRAFTS AND DECOR IDEAS

Hello everyone ,With the festival of lights around the corner am here with some easy DIY craft ideas to add sparkle and creative touch to your celebrations.


1. DIY CLAY DIYAS:
Diwali is never complete without diyas. Since earthern clays involve baking process why not try making this simple air dry clay diyas. Avoid cracks while kneading the clay as oil might leak through them.
Tutorial of DIY diyas 


2. LOTUS ASANA FOR LAKSHMI PUJA:
Make this glittering lotus Asana to keep the idol of Lord lakshmi.
Tutorial of Lotus Asana


3.KALASH CLAY MURAL:
 Use packaging cardboard and clay to create this mural work.
Tutorial of Kalash clay mural


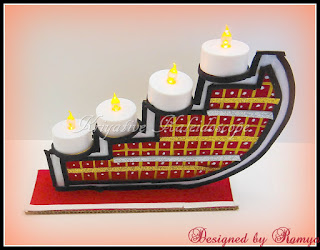
4.CARDBOARD T LIGHT HOLDER:
This one will sure catch the attention of your guests. Arrange the Diyas in this glittering and colourful diya stand made using cardboard.
Tutorial of Diya stand


5.PISTACHIO SHELLS T LIGHT HOLDER:
An innovative T light holder by recycling old CD and pistachio shells.
Tutorial of Pistachio shells T light holder


6.DIYA PLATTER USING GLITTER FOAM SHEETS:
Have little time to craft?? Then this one is perfect for you as this platter can be made in 20 min.
Tutorial of Diya platter using foam sheets


7. CLAY RANGOLI:
Festivals are never complete without the colorful rangoli. For a change try this playdoh or clay rangoli which will surely win appreciation from your guests.
Clay Rangoli


8. SIMPLE THORAN:
Use old invitation cards to make this simple shubh/labh wall hanging or stickers. You can also decorate them using kundans or rhinestone chain.


9. GLITTER FOAM FLOWERS:
Make small flowers using glitter foam sheets and arrange them in between diyas to bring that colorful bling to your festival.

10. DIWALI GIFT IDEA:
Gift your loved ones this Diwali with this chocolate flower bouquet.
Tutorial of chocolate flower bouquet


Other ideas:
Here I have compiled ideas from other websites...
1. 10 Diwali card making ideas:
http://artsycraftsymom.com/diwali-card-making-ideas-diwali-dhamaka/

2. Ideas to decorate your home:
http://designdecoranddisha.blogspot.in/2014/10/diwali-decor-ideas-part-i.html

3. Rangoli ideas and diwali kids crafts:
http://artsycraftsymom.com/40-diwali-ideas-cards-crafts-decor-diy/

Wishing all my friends happy and safe Diwali... See you soon with another post..


Wednesday, October 12, 2016

SIMPLE URBAN SKETCHES USING FOUNTAIN PEN

Hello and welcome to my blog!! Today am sharing some simple urban sketches made using fountain pen. 


Whenever I visited some of the landmark places in US  I used to see people doing quick sketches of them in their sketchbook. I too wanted to carry a small moleskine journal with me and  make sketching travelogue in future. So to start with  tried some of the urban pen sketches from the net before proceeding to sketch outdoors. 


The pen that they use for urban sketching is pigma micron pen. Since that pen was unavailable in the nearby shops I used my fountain pen to sketch these images.I love writing with fountain pen that even today I write my daily journal and dairy using them rather than ball point. The fountain pen that I used here was a gift from my husband. 


Initially I thought that urban sketches follow the same rules as normal drawings of buildings so  made all the lines with a ruler and was shading than hatching. But soon I understood that the beauty of pen sketches lies in their  loose casual strokes as they are drawn quickly mostly under 20 min. So I followed the tutorial of Alphonso Dunn on urban sketching. 


Hope you all liked my pen drawings. See you soon with another interesting post.

Tuesday, October 4, 2016

PERSPECTIVE DRAWINGS

Hello friends, Welcome back...  Hope you all are enjoying Navarathri/ Dussera celebrations . After 4 years am very happy to  celebrate this festival in India with my parents. Coming to today's post am sharing with you all some of my perspective sketches.

I was always fascinated by the urban and architectural sketches and the 3D effect they convey. So decided to try them and followed the turotial of The Art maker team for understanding the concept of perspective sketching.

                                                       One point perspective sketches

This sketch was inspired from Pinterest.

I followed the tutorial of DGFSMart to draw the above sketch.

Two point perspective sketches

 This was inspired from a sketch by exit studios.

This sketch took two days for me to finish. I followed the video tutorial of circle line art school to do this sketch.

Thanks for visiting my blog!! See you soon with another post.

Saturday, September 24, 2016

LANDSCAPE PEN AND PENCIL SKETCH

Hello Friends , Welcome back to my blog!! I am sharing with you all a pen and pencil sketch of the same landscape " Kirkwall Harbour basin - Scotland." The inspiration for this sketch is from the book  - " Beautiful landscapes " by Diane Wright of drawing made easy series. 
    This is the first book which I had shopped when I was in US. Though I had used it for learning the basics I didn't try sketching an entire landscape. I bought this book along while coming from US and started sketching the outline of this landscape to recover from jet lag. 
    Later that week I had to go the lab for routine tests. Since it will take 3 hours  for the tests to complete took the sketch book and pencils with me and started shading . Many people who passed by stood there for sometime seeing me sketch. Though initially it was embarrassing slowly started enjoying the company of people around me. By the time I was out of the lab I was done with this sketch. 


After seeing the video tutorial of Devin Viele  I got interested in sketching using ball point pen so was searching for some reference images to start with . I spotted a sketch similar to the above so thought of sketching the same using ball point pen. This is my debut attempt in ball point sketch, I used Rorito 0.7mm ball point pen. 


Hope you all liked the sketches. Your feedback/ suggestions are welcome. Do tell me which one you like better. See you soon with another post. Have a crafty weekend. 

Sunday, September 18, 2016

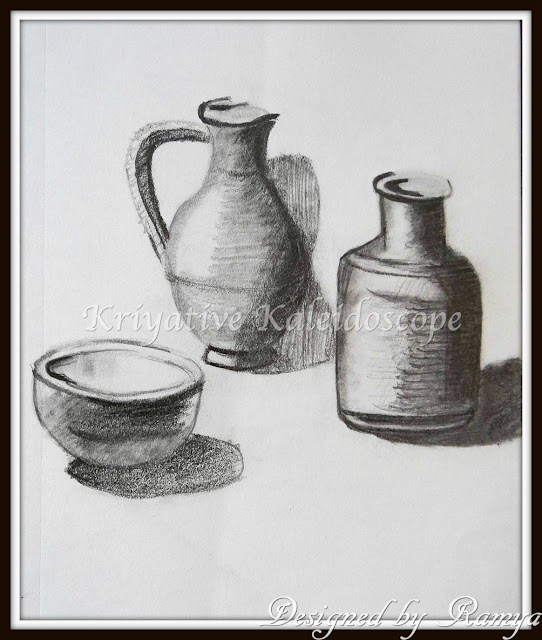
STILL LIFE SKETCHES

Hello friends , feeling excited to be back to blog land after six months of maternity vacation. Happy to inform you all that now am a mother of 45 days old cute princess who keeps me busy all the time. As I had come to India for my delivery and had to vacate my house in US couldn't carry my craft supplies. Also I was busy with doctor check ups , relatives visiting me and baby shower function so read my crafty pals blog. 

To keep myself occupied and away from the pregnancy blues started to do pencil sketching. I was little hesitant to post after such a long time but it was my husband who encouraged me to post my sketches which I did during my pregnancy. 

Sharing some of my still life sketches...  All the sketches are done on 60 lb , fine tooth surface paper   using artist's loft pencils.


Thanks for visiting. See you soon with another post. 


Thursday, March 31, 2016

"FLOWERS" - MIXED MEDIA MINI CANVAS

Hello friends, Welcome to my blog!! Today am sharing a  mixed media canvas based on the theme "Flowers". I spotted these cute mini canvases when I had been to Daiso Japan last weekend .
I applied a coat of gesso to the canvas and used acrylic paints of pink, orange and red colors with water spray. I dabbed some paints and then sprayed water upon them to get a drooling effect. Once it was dried I started making random textures using Liquitex texture paste and stencils. I had few scraps of pattern paper left over after using it for the sewing machine project. So pasted those upon the canvas. 
All the flowers are handmade using recollections punches and the lace is crocheted using i hook and wool. The black hearts are hand cut from empty cereal cartons and colored using black acrylics. The sentient is handwritten. 
Hope you all liked my canvas!! See you soon with another interesting post.

Entering this project to the following competitions:
4 crafty chicks - " Anything goes"
Lessology challenge - " Hand lettered love" - The sentiment is handwritten and the black hearts are made by recycling empty cereal cartons.
Stamplorations challenge -


We love to create challenge blog - " Anything creative/ Mixed media
Anything but cute challenge -  " Crazy for color "- I have used vibrant colors and lots of flowers in my project. 

Friday, March 18, 2016

MANDALA DESIGN PAPER EARRINGS

Hello friends, Welcome to my blog!! Today I have an interesting post to share with you all.  I maintain a craft journal/ dairy where I write down the list of things that I wanted to try new.  Usually while making a project I try to incorporate something from the list. In this jewellery I have used three new techniques which was pending in my wish list for a long time. 
After seeing all the adult coloring books with Mandala designs I too wanted to draw and color a Mandala pattern. This month at earrings everyday challenge the inspiration pictures are about " arabesque art" - an intricate geometric art found on the ceiling of the Mosques. Those stunning patterns reminded me of Mandalas so I decided to make these earrings. 
For the base of the earring instead of clay I used paper ( one more thing from my wish list). I stacked 20 pieces of circular sheets to create a thick base.  I drew the design using black pen and colored using acrylics. After decorating it with the rhinestone chain I felt the earring was incomplete. A closer look at the inspiration picture gave me the idea to use clear resin which I had bought long time back but didn't use it. 
I followed the tutorial of Art'zire and did my maiden attempt in casting the resin.I wasn't satisfied with the result as a small amount of resin leaked from the edges of the rhinestone chain. I should have sealed the edges to make it non-porous. Hope to get better next time. I thank earrings everyday for their awesome inspiration which motivated me to try many new things. Hop on to their blog and have a look at the gallery of inspiration from other artists. 

Submitting to 
1. Earrings everyday - I was inspired by the colors and geometric patterns.

Tuesday, March 15, 2016

SEWING MACHINE SHAPED BOX CARD

Hello Friends, Welcome back to my blog!! Today am sharing with you all a special post made for a special person in my life. It is a beautiful journey of us together from the day I was born. She is my best friend, my source of strength and my pillar of support. Hope you would have guessed it !! Yes , this post is a small dedication to my mom for her birthday.

I was thinking for many weeks what I will gift her this year. When she told me few days back that she is altering some of my dresses I got the idea of making sewing machine shaped card for her as she loves stitching.
There are lot of cute memories associated with this sewing machine. My mom learnt sewing after I was born so that she could stitch variety of dresses for me. She used to stitch frocks with flowers and dolls of my favorite color. Later in life she got busy juggling between office and household that she didn't have time to pursue her hobby. Few months back she mentioned that she wanted to learn sewing again. I hope this card will motivate her to sew more. 
 
I used my sewing machine ( brother - xl2600 i) as a reference to create this card . For making this card I used canvas paper as they are thick and sturdy. For the base ( bobbin cover area) I have recycled an empty phone packaging box. I have used DCWV - once upon a time paper pack for covering the whole card. At the edges I have glued black lace from recollections.  


I made the stitch selector dial by using a circular piece of packaging cardboard and plastic bottle cap. For the hand wheel at the side I recycled an empty ribbon spool. The spool pin / thread spool is made up of empty tissue roll and cardboard pieces. I used push pins for the stitch length adjustment lever. 
The borders around the selection dial and thread guide are hand crocheted using i hook. For the needle I have used a toothpick colored in black. The spool storage box is made using the recollections card stock.


All the flowers are handmade using recollections punches. The leaves are hand cut from glitter foam sheet and card stock. The piece of cloth kept under the needle is the leftover from our ( mom and me) first sewing project together. Instead of a printed or stamped sentiment I decided to try my hands on calligraphy writing. These are my first attempts of calligraphy fonts using rolling ball pen ( gel pen). I followed the tutorial of  Julie Turrie .

TUTORIAL

Draw the shape of a sewing machine on a canvas paper and cut 2 pieces - for front and back. Make sure the backside is slightly bigger than front. Cut slits on the front piece for the thread guide and stitch length adjustments. Cover it with the pattern paper. 

To make the box first measure the length of the front piece. For curved portions measure the length using thread and scale method. Now cut a strip from a card stock measuring the length measured and width 2.5". Mark 0.5" up and down on the cut strip and draw a line. Make a fold on the line drawn and cut small slits as shown above. 

Glue one side of the slits to the front piece of the card. The slits make it easy to follow the curvy shape of the sewing machine.

Glue the back portion to the other side of the slits. Finally paste the whole thing upon a packaging box and decorate it of your choice.

Thanks for reading this long post patiently.Hope you all liked my card!! Come back soon for another interesting project. Do post your comments/suggestions.

Submitting this project to

1.Lulupu challenge blog - 4th birthday celebration - I made a birthday card and used the elements of  C2- buttons, pattern paper , glitter foam sheets and flowers.
2.Lessology challenge - "Hand lettered love" - All the sentiments here are hand written. I have recycled packaging carton , empty ribbon spool , plastic cap , tissue paper roll etc.
3. Country view challenge - " Industrial" - I have made a crafty sewing machine.
4.Dream valley challenges - " All about birthdays" - I made a sewing machine shaped card for my mom's birthday.
5.The craft place challenge blog - " Anything goes"

Monday, February 1, 2016

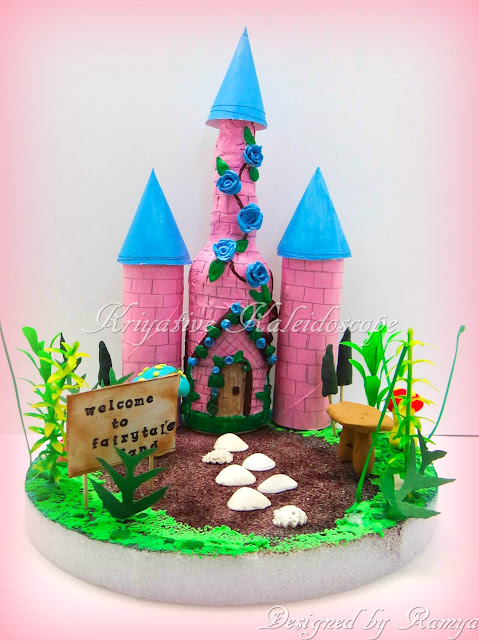
FAIRY TALE LAND

Hello friends, Welcome to my blog!! Am posting after a short break as I was busy learning still life sketching and painting. Will post the pictures soon. Today am sharing with you all "Fairy tale land" project made by recycling bottle.  As the title says this project has a big tale behind it.  Let me try to make it short ( LOL).


For this year Christmas holidays we preferred "Staycation " as it was raining outside due to  the Elnino effect". So to spend our time we went to library and book shop. One day I came across a book called "Amazing facts about Walt Disney and Disney World". As my husband had promised a trip to Disneyland for the second time in the near future I was curious to know more about it.As I read the read I was amazed by the creativity and perfection which goes behind in making each of the  rides and attractions. The quote of Walt Disney " When you're curious you ind lots of interesting things to do" gave me the inspiration to create something different. 


The second book which I read that day was about " Polymer clay works" by famous artists. The book had some amazing jewelry designs, 3D sculpting etc. The one project that caught my attention was polymer clay sculpting on a glass bottle - Altered art on a bottle using polymer clay. Both these books influenced my thoughts and inspired me to create this "Fairy tale land".

Once the theme is set I decided to make a castle by altering a glass bottle. I used tissue paper rolls to finish my castle. I took the reference of the castle from Disneyworld's Cinderella castle. 


I used empty castor oil bottle and air dry clay for the center of the castle. The design, flowers and the bricks was inspired by this video. I pasted the clay upon the bottle using tacky glue. Once the clay got dried I applied thick coats of gesso and then painted using acrylics.  For the top of the castle I rolled out a cardstock into the shape of a cone. 


For the base I have used styrofoam sheet and covered the sides of the  base with a layer of green playdoh. For the center of the garden I applied brown acrylics. Then I began to stick the foliage. The leaves are hand cut and the small trees are store bought. The mushrooms , flowers and bench are made using playdoh.  I used sea shells to make a path for the castle. The welcome board is made using packaging cardboard, pattern paper and toothpicks. 


I fee that everybody's life is a fairy tale where there are a lot of magical moments to cherish. The one thing that we should follow from Walt disney's life is - lets make a beautiful and happy world around us so that others who enter our world can also experience that happiness and joy like we do when we visit Disney World. I wish that 2016 will bring a lot of magical moments in your life that you've got a tale to write at the end of this year!!!

Submitting to

1. Country view challenge - "Be inspired by bottles"
2.Shopping our stash challenge - "Inspired by a book" - I was inspired by the book " Amazing facts about Walt Disney and Disney World"
3.Rhedd's creative spirit
4.Altered eclectics
5.4 crafty chicks - " Anything but a card"